脚本序列化 自己编辑的脚本,其中的可以序列化的部分(比如public访问标识符下的),会被单独储存。
如果脚本已经在Hierarchy窗口中挂载,那么在inspector窗口中修改的脚本内容,会被保存在对应的场景.unity文件;如果脚本在一个prefab里面,那么在prefab编辑模式下修改的内容会被保存在.prefab文件;如果是在场景中修改了prefab参数,需要点击“override in prefab”。
查看数据 在Edit——Project Settings——Editor——Asset Serialization里面,可以选择序列化对象的保存方式
默认force text会让编辑模式下查看资源结构更方便
可以把.prefab或.unity文件直接丢进文本编辑器中来查看序列化的数据。prefab中还会保存对象的实例ID,这样反序列化的效率就会提高
私有序列化数据的编辑器拓展 使用SerializeField特性来序列化脚本中的私有字段。
这个时候想用拓展编辑器来编辑数据的话,可以使用SerializedObject和SerializedProperty来设置数据
关于脚本拓展编辑器,在“第三章——面板拓展——Inspector面板”里面提到过
在Script文件夹中新建ExtendingInspectorWithPrivate脚本
1
2
3
4
5
6
7
8
9
10
11
12
13
14
15
16
17
18
19
20
21
22
23
24
25
26
27
28
29
30
31
using UnityEngine;#if UNITY_EDITOR using UnityEditor;#endif public class ExtendingInspectorWithPrivate : MonoBehaviour { [SerializeField ] private int Id; [SerializeField ] private new string name; [SerializeField ] private GameObject prefab; } #if UNITY_EDITOR [CustomEditor(typeof(ExtendingInspectorWithPrivate)) ] public class ScriptInsector : Editor { public override void OnInspectorGUI () { serializedObject.Update(); SerializedProperty property = serializedObject.FindProperty("Id" ); property.intValue = EditorGUILayout.IntField("主键" , property.intValue); property = serializedObject.FindProperty("name" ); property.stringValue = EditorGUILayout.TextField("姓名" , property.stringValue); property = serializedObject.FindProperty("prefab" ); property.objectReferenceValue = EditorGUILayout.ObjectField("游戏对象" , property.objectReferenceValue, typeof (GameObject), true ); serializedObject.ApplyModifiedProperties(); } } #endif
如果public字段不想被显示在inspector中的话,可以设置[HideInInspector]特性
SerializedObject使用原生绘制方式 serializedObject只能在Editor中使用,它专门用于获取设置的序列化信息。
使用EditorGUILayout.PropertyField方法来使用原生方法绘制某个对象,其余使用自定义方法
1
2
3
4
5
6
7
8
9
10
11
12
13
14
15
16
17
18
19
20
21
22
23
24
25
26
27
using UnityEngine;#if UNITY_EDITOR using UnityEditor;#endif public class ExtendingInspectorWithOriginal : MonoBehaviour { [SerializeField ] private int id; [SerializeField ] private GameObject[] targets; } #if UNITY_EDITOR [CustomEditor(typeof(ExtendingInspectorWithOriginal)) ] public class ScriptInspector : Editor { public override void OnInspectorGUI () { serializedObject.Update(); SerializedProperty property = serializedObject.FindProperty("id" ); property.intValue = EditorGUILayout.IntField("主键" , property.intValue); EditorGUILayout.PropertyField(serializedObject.FindProperty("targets" ), true ); serializedObject.ApplyModifiedProperties(); } } #endif
监听部分元素修改事件 将需要监听的GUI元素写在EditorGUI.BeginChangeCheck()下;然后将修改后的事件放在if(EditorGUI.EndChangeCheck()){}方法中。
上面的方法属于拓展编辑器的写法,如果是普通简单的MonoBehaviour脚本,可以将代码写在OnValidate方法下,可以实现相同的效果
1
2
3
4
void OnValidate (){ Debug.Log("编辑器面板信息发生了变化" ); }
在Script文件夹中新建ListeningInspectorElement脚本
1
2
3
4
5
6
7
8
9
10
11
12
13
14
15
16
17
18
19
20
21
22
23
24
25
26
using UnityEngine;#if UNITY_EDITOR using UnityEditor;#endif public class ListeningInspectorElement : MonoBehaviour { [SerializeField ] private GameObject[] targets; } #if UNITY_EDITOR [CustomEditor(typeof(ListeningInspectorElement)) ] public class ScriptInspector2 : Editor { public override void OnInspectorGUI () { serializedObject.Update(); EditorGUI.BeginChangeCheck(); EditorGUILayout.PropertyField(serializedObject.FindProperty("targets" ), true ); if (EditorGUI.EndChangeCheck()) Debug.Log("元素发生变化" ); if (GUI.changed) { } serializedObject.ApplyModifiedProperties(); } } #endif
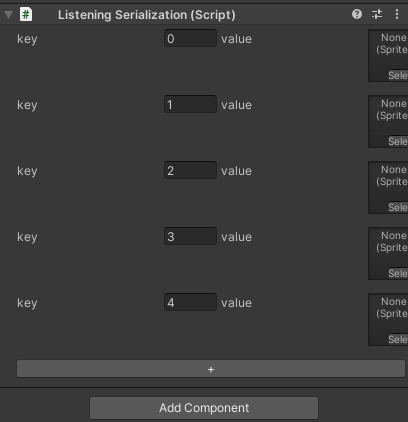
序列化、反序列化监听 目前,序列化和反序列化都是在编辑器面板中操作后Unity自动处理的,其实也可以对它进行监听,比如序列化之前坐点什么或者序列化之后做点什么。
Unity序列化目前是不支持字典的,可以通过ISerializationCallBackReceiver接口实现OnBeforeSerialize和OnAfterDeserialize方法来实现字典操作
在Script文件夹中新建ListeningInspectorElement脚本
1
2
3
4
5
6
7
8
9
10
11
12
13
14
15
16
17
18
19
20
21
22
23
24
25
26
27
28
29
30
31
32
33
34
35
36
37
38
39
40
41
42
43
44
45
46
47
48
49
50
51
52
53
54
55
56
57
58
59
60
61
62
63
64
65
66
67
68
69
70
71
72
73
74
75
76
77
78
79
80
using System.Collections;using System.Collections.Generic;using UnityEngine;#if UNITY_EDITOR using UnityEditor;#endif public class ListeningSerialization : MonoBehaviour , ISerializationCallbackReceiver { [SerializeField ] private List<Sprite> m_Values = new List<Sprite>(); [SerializeField ] private List<string > m_Keys = new List<string >(); public Dictionary<string , Sprite> spriteDic = new Dictionary<string , Sprite>(); #region ISerializationCallbackReceiver implementation void ISerializationCallbackReceiver.OnBeforeSerialize() { m_Keys.Clear(); m_Values.Clear(); foreach (KeyValuePair<string ,Sprite> pair in spriteDic) { m_Keys.Add(pair.Key); m_Values.Add(pair.Value); } } void ISerializationCallbackReceiver.OnAfterDeserialize() { spriteDic.Clear(); if (m_Keys.Count != m_Values.Count) Debug.LogError("键和值长度不匹配" ); else { for (int i = 0 ; i < m_Keys.Count; i++) { spriteDic[m_Keys[i]] = m_Values[i]; } } } #endregion } #if UNITY_EDITOR [CustomEditor(typeof(ListeningSerialization)) ] public class ScriptInspector3 : Editor { public override void OnInspectorGUI () { serializedObject.Update(); SerializedProperty propertyKey = serializedObject.FindProperty("m_Keys" ); SerializedProperty propertyValue = serializedObject.FindProperty("m_Values" ); int size = propertyKey.arraySize; GUILayout.BeginVertical(); for (int i = 0 ; i < size; i++) { GUILayout.BeginHorizontal(); SerializedProperty key = propertyKey.GetArrayElementAtIndex(i); SerializedProperty value = propertyValue.GetArrayElementAtIndex(i); key.stringValue = EditorGUILayout.TextField("key" , key.stringValue); value .objectReferenceValue = EditorGUILayout.ObjectField("value" , value .objectReferenceValue, typeof (Sprite), false ); GUILayout.EndHorizontal(); } GUILayout.EndVertical(); GUILayout.BeginHorizontal(); if (GUILayout.Button("+" )) { (target as ListeningSerialization).spriteDic[size.ToString()] = null ; } GUILayout.EndHorizontal(); serializedObject.ApplyModifiedProperties(); } } #endif
在实际的开发中,需要序列化的可能不是简单的字符串、数值等属性,而有可能是包含多种数据的复杂的类,这种类需要在类前加上[System.Serializable]才能在Unity中序列化处理。如果不希望序列化,可以添加[System.NonSerialized]特性
相关代码如下
1 2 3 4 5 6 7 8 9 [SerializeField ] public List<PlayerInfo> m_PlayerInfo;[System.Serializable ] public class PlayerInfo { public int id; public string name; }
ScriptableObject ScriptableObject存在的意义是,当我们需要序列化一些编辑器数据时,没有必要依赖游戏对象使用游戏脚本。而使用ScriptableObject,在需要时将对应的asset加载进来就好了。
首先演示简单用法,快速创建一个自己预制的ScriptableObject
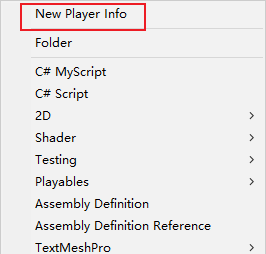
在Script文件夹中新建NewPlayerInfo脚本,使用CreateAssetMenu特性,类似于之前的MenuItem特性
1
2
3
4
5
6
7
8
9
10
11
12
13
14
15
16
17
using System.Collections;using System.Collections.Generic;using UnityEngine;[CreateAssetMenu(fileName = "New Player Info" ) ] public class NewPlayerInfo : ScriptableObject { [SerializeField ] public List<PlayerInfo> m_PlayerInfo; [System.Serializable ] public class PlayerInfo { public int id; public string name; } }
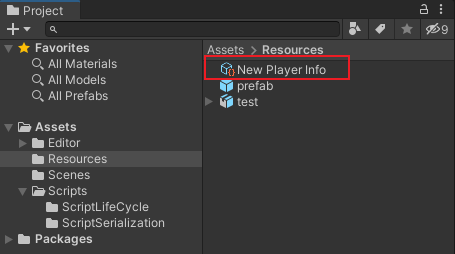
在Resources文件夹里面,创建自己的ScriptableObject asset。
在Script文件夹中新建MainForPlayerInfo脚本,使用Resources.Load方法来直接读取asset
1
2
3
4
5
6
7
8
9
10
11
using UnityEngine;public class MainForPlayerInfo : MonoBehaviour { private void Start () { NewPlayerInfo newPlayerInfo = Resources.Load<NewPlayerInfo>("New Player Info" ); Debug.LogFormat("name : {0} id : {1}" , newPlayerInfo.m_PlayerInfo[0 ].name, newPlayerInfo.m_PlayerInfo[0 ].id); } }
将MainForPlayerInfo脚本挂载在游戏对象上,unity控制台就可以打印出对应的信息了
批量创建ScriptableObject 新建CreateMultipleScriptableObject脚本,使用之前第三章的创建方式
1
2
3
4
5
6
7
8
9
10
11
12
13
14
15
16
17
18
19
20
using System.Collections;using System.Collections.Generic;using UnityEngine;using UnityEditor;public class CreateMultipleScriptableObject { [MenuItem("Assets/Create ScriptableObject" ) ] static void CreateScriptableObject () { NewPlayerInfo playerInfo = ScriptableObject.CreateInstance<NewPlayerInfo>(); playerInfo.m_PlayerInfo = new List<NewPlayerInfo.PlayerInfo>(); playerInfo.m_PlayerInfo.Add(new NewPlayerInfo.PlayerInfo() { id = 100 , name = "test" }); AssetDatabase.CreateAsset(playerInfo, "Assets/Resources/Create NewPlayerInfo.asset" ); AssetDatabase.SaveAssets(); AssetDatabase.Refresh(); } }
脚本的Attribute特性和自定义 Unity内置了很多脚本特性,我们也可以自定义特性
在Script文件夹新建RangeIntAttribute脚本,注意特性类的取名方法
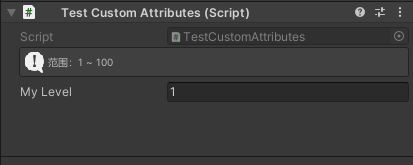
1
2
3
4
5
6
7
8
9
10
11
12
13
14
15
16
17
18
19
20
21
22
23
24
25
26
27
28
29
30
31
32
33
34
35
36
37
38
39
40
41
42
using UnityEngine;#if UNITY_EDITOR using UnityEditor;#endif public sealed class RangeIntAttribute : PropertyAttribute { public readonly int min; public readonly int max; public RangeIntAttribute (int min,int max { this .min = min; this .max = max; } } #if UNITY_EDITOR [CustomPropertyDrawer(typeof(RangeIntAttribute)) ] public sealed class RangeIntDrawer : PropertyDrawer { public override float GetPropertyHeight (SerializedProperty property, GUIContent label ) { return 100 ; } public override void OnGUI (Rect position, SerializedProperty property, GUIContent label ) { RangeIntAttribute attribute = this .attribute as RangeIntAttribute; property.intValue = Mathf.Clamp(property.intValue, attribute.min, attribute.max); EditorGUI.HelpBox( new Rect(position.x, position.y, position.width, 30 ), string .Format("范围:{0} ~ {1}" , attribute.min, attribute.max), MessageType.Info); EditorGUI.PropertyField( new Rect(position.x,position.y + 35 ,position.width,20 ), property, label); } } #endif
将自定义的特性类继承PropertyAttribute,将Unity编辑器应用特性的类继承PropertyDrawer,当数据在inspector中发生修改时,就会回调到OnGUI方法中(官方文档里面还包含了UIElements的定义方法)
新建一个脚本来测试
1
2
3
4
5
6
7
using UnityEngine;public class TestCustomAttributes : MonoBehaviour { [RangeInt(1, 100) ] public int myLevel; }
基于MonoBehaviour的单例脚本 继承自monobehaviour的脚本,都是unity预先实例化过的,不可以使用 new 关键字,它和游戏内的GameObject高度绑定,对象消失后脚本也会释放。
游戏中大量的逻辑代码并不需要都继承monoBehaviour,除了依赖脚本生命周期的回调方法以外。有些功能比较单一且需要用到脚本生命周期方法的类,就比较适合使用单例脚本了,单例脚本的特点是它必须依赖游戏对象,必须保证它自己不被主动卸载掉。
单例脚本的测试,在Script文件夹中新建SingletonGlobal脚本
1
2
3
4
5
6
7
8
9
10
11
12
13
14
15
16
17
18
19
20
21
using UnityEngine;public class SingletonGlobal : MonoBehaviour { public static SingletonGlobal instance; static SingletonGlobal () { GameObject go = new GameObject("#SingletonGlobal#" ); DontDestroyOnLoad(go); instance = go.AddComponent<SingletonGlobal>(); } public void DoSomeThing () { Debug.Log("DoSomeThing" ); } private void Start () { Debug.Log("StartSingleton" ); } }
然后,在需要调用的地方直接引用,会自动挂载
1
2
3
4
5
6
7
private void OnGUI () { if (GUILayout.Button("单例测试" )) { SingletonGlobal.instance.DoSomeThing(); } }
基于Unity协程的定时器 封装一个不依赖于脚本实现的定时器,利用协程程序
在Script文件夹中新建WaitTimeManager脚本
1
2
3
4
5
6
7
8
9
10
11
12
13
14
15
16
17
18
19
20
21
22
23
24
25
26
27
28
29
30
31
32
33
34
35
36
37
38
39
40
41
using System.Collections;using System.Collections.Generic;using UnityEngine;using UnityEngine.Events;public class WaitTimeManager { private static TaskBehaviour m_Task; static WaitTimeManager () { GameObject go = new GameObject("#WaitTimeManager#" ); GameObject.DontDestroyOnLoad(go); m_Task = go.AddComponent<TaskBehaviour>(); } static public Coroutine WaitTime (float time,UnityAction callback { return m_Task.StartCoroutine(Coroutine(time, callback)); } static public void CancelWait (ref Coroutine coroutine { if (coroutine != null ) { m_Task.StopCoroutine(coroutine); coroutine = null ; } } static IEnumerator Coroutine (float time,UnityAction callback { yield return new WaitForSeconds (time ) if (callback != null ) { callback(); } } class TaskBehaviour : MonoBehaviour { } }
无论是脚本还是类,在需要定时器的地方调用它即可,相关代码如下
1 2 3 4 5 6 Coroutine coroutine = WaitTimeManager.WaitTime(5f ,delegate { Debug.Log("等待5秒后回调" ) }); WaitTimeManager.CancelWait(ref coroutine);
CustomYieldInstruction CustomYieldInstruction 允许您实现自定义 yield 指令以暂停协程执行,直到一个Events发生。在底层,自定义 yield 指令只是另一个正在运行的协程。也就是说,通过嵌套协程,让一个协程来控制另一个协程是否继续
要实现它,请从 CustomYieldInstruction 类继承并覆盖 keepWaiting 属性。保持协程暂停返回 true。让协程继续执行返回 false。在 MonoBehaviour.Update 之后和 MonoBehaviour.LateUpdate 之前的每一帧都会查询 keepWaiting 属性。
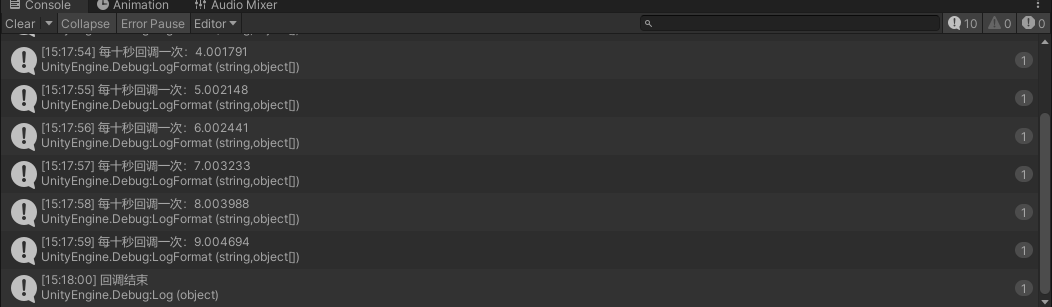
使用以下脚本实现高级计时器功能,在10秒的计时内,每秒完成一次回调
1
2
3
4
5
6
7
8
9
10
11
12
13
14
15
16
17
18
19
20
21
22
23
24
25
26
27
28
29
30
31
32
33
34
35
36
37
38
39
40
41
42
43
44
45
46
47
using System.Collections;using System.Collections.Generic;using UnityEngine;using UnityEngine.Events;public class CustomYieldDelay : MonoBehaviour { private IEnumerator Start () { yield return new CustomWait (10f , 1f , ( { Debug.LogFormat("每十秒回调一次:{0}" , Time.time); }); Debug.Log("回调结束" ); } public class CustomWait : CustomYieldInstruction { public override bool keepWaiting { get { if (Time.time - m_StartTime >= m_Time) { return false ; } else if (Time.time - m_LastTime >= m_Interval) { m_LastTime = Time.time; m_IntervalCallback(); } return true ; } } private UnityAction m_IntervalCallback; private float m_StartTime,m_LastTime,m_Interval,m_Time; public CustomWait (float time,float interval,UnityAction callback { m_StartTime = Time.time; m_LastTime = Time.time; m_Interval = interval; m_Time = time; m_IntervalCallback = callback; } } }
工作线程 利用Job System实现安全的多线程。
例如,场景中有很多对象需要同步坐标,此时就可以考虑同步坐标放在工作线程中。
继承IJobParallelForTransform接口,并且实现Execute()方法,就可以在工作线程中处理耗时操作了。
1
2
3
4
5
6
7
8
9
10
11
12
13
14
15
16
17
18
19
20
21
22
23
24
25
26
27
28
29
30
31
32
33
34
35
36
37
38
39
40
41
42
using UnityEngine;using Unity.Jobs;using UnityEngine.Jobs;using Unity.Collections;public class SyncTransformWithJob : MonoBehaviour { public Transform[] cubes; private void Update () { if (Input.GetMouseButtonDown(0 )) { NativeArray<Vector3> position = new NativeArray<Vector3>(cubes.Length, Allocator.Persistent); for (int i = 0 ; i < position.Length; i++) { position[i] = Vector3.one * i; } TransformAccessArray transformAccessArray = new TransformAccessArray(cubes); MyJob job = new MyJob() { position = position }; JobHandle jobHandle = job.Schedule(transformAccessArray); jobHandle.Complete(); Debug.Log("工作线程结束" ); transformAccessArray.Dispose(); position.Dispose(); } } struct MyJob : IJobParallelForTransform { [ReadOnly ] public NativeArray<Vector3> position; public void Execute (int index, TransformAccess transform { transform.position = position[index]; } } }
主线程和工作线程的数据需要使用Native来传递,工作线程只需要读取数据,并不需要设置数据,所以需要标记[ReadOnly]