寻路就是提供一个目标点,根据障碍物自动计算出一条最优的路径。Unity寻路使用的是AStar算法。寻路可分为动态寻路和静态寻路。动态寻路就是障碍物的位置可以动态修改。静态寻路表示无法移动的障碍物,静态寻路是效率更高的寻路。
导航和寻路 - Unity 手册 (unity3d.com)
设置网格
参与寻路计算的对象需要选中Navigation Static复选框,接着在导航栏中选择Window——AI——Navigation。
在Bake选项卡中,我们可以设置代理角色胶囊体的一些参数。
最后,单击Bake按钮即可。

我们来做一个简单寻路,让图中的方块越过障碍物自动走路
首先要给方块添加Navmesh Agent组件,然后在方块上挂载此脚本
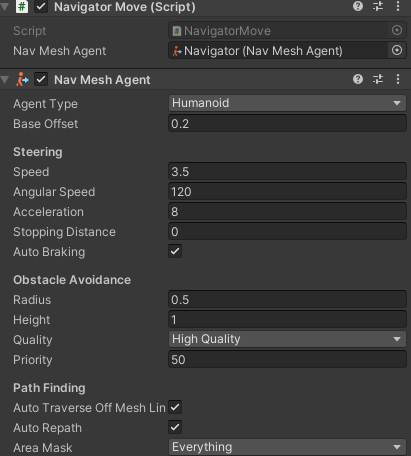
新建NavigatorMove脚本
1
2
3
4
5
6
7
8
9
10
11
12
13
14
15
16
17
18
19
20
21
22
23
| using UnityEngine;
using UnityEngine.AI;
public class NavigatorMove : MonoBehaviour
{
public NavMeshAgent navMeshAgent;
private void Update()
{
if (Input.GetMouseButton(0))
{
Ray ray = Camera.main.ScreenPointToRay(Input.mousePosition);
RaycastHit[] hits = Physics.RaycastAll(ray);
foreach (var hit in hits)
{
string name = hit.collider.gameObject.name;
if (name == "Plane")
navMeshAgent.SetDestination(hit.point);
}
}
}
}
|
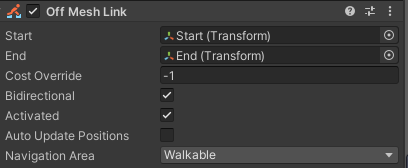
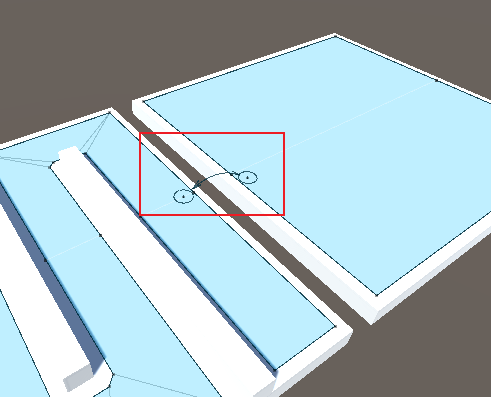
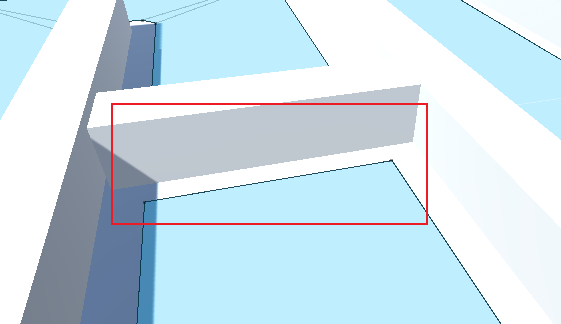
连接两点
寻路系统专门提供了Off Mesh Link组件来处理不连续的导航网格之间的连接,用来处理跳过沟渠、翻过栅栏或者打开门等场景
我们在一个父对象上挂载Off Mesh Link组件,并且新建两个空的子对象,这里命名为Start和End,分别放在需要跨越的两侧NevMesh上,并且在Off Mesh Link组件内添加好引用

网格外链接 (Off-Mesh Link) - Unity 手册 (unity3d.com)
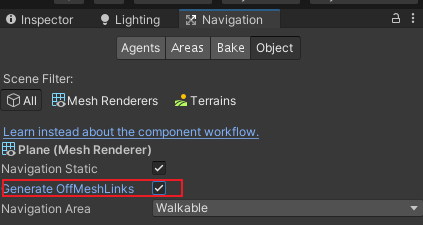
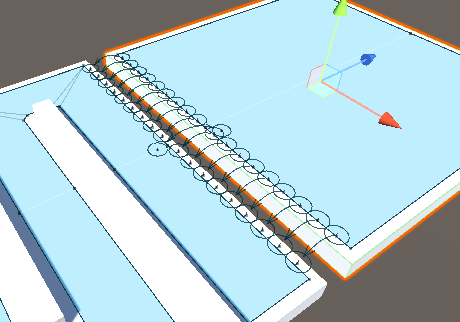
我们可以在烘焙过程中自动创造Off Mesh Links,上一节所提到的Off Mesh Links选项就是用来做这个的
先选中一个Navigation Static对象,然后在Navigation面板的Object选项卡中勾选Generate OffMeshLinks,烘焙时就会产生link了
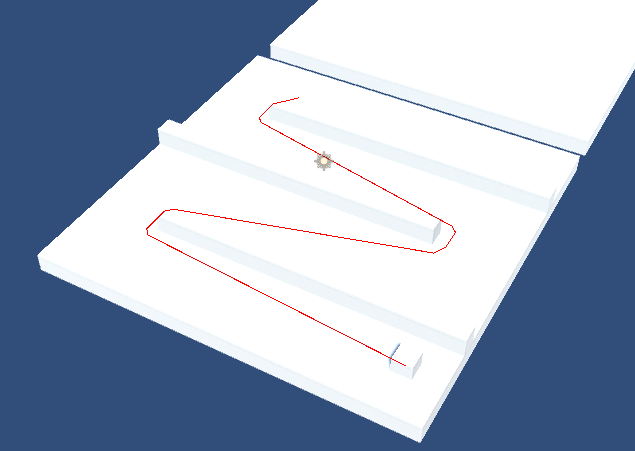
获取寻路路径
我们可以使用NavMesh.CalculatePath()方法来计算出到达目标点的路径,使用此方法提前计算出路径然后通过Debug.DrawLine()方法在Scene中查看
新建ShowNavPath脚本
1
2
3
4
5
6
7
8
9
10
11
12
13
14
15
16
17
18
19
20
21
22
23
24
25
| using UnityEngine;
using UnityEngine.AI;
public class ShowNavPath : MonoBehaviour
{
public NavMeshPath m_Path = null;
public NavMeshAgent navMeshAgent;
public Transform target;
void Start()
{
m_Path = new NavMeshPath();
NavMesh.CalculatePath(transform.position, target.position, NavMesh.AllAreas, m_Path);
}
void Update()
{
for (int i = 0; i < m_Path.corners.Length-1; i++)
{
Debug.DrawLine(m_Path.corners[i], m_Path.corners[i + 1], Color.red);
}
}
}
|
动态阻挡
如果在一个寻路系统中有空气墙的设定,玩家需要一定的条件才能使用寻路系统穿过空气墙,这时候空气墙就需要设置动态阻挡。
给需要动态阻挡的对象添加Nav Mesh Obstacle组件,只要给这个对象SetActive,即可控制是否发生动态阻挡。
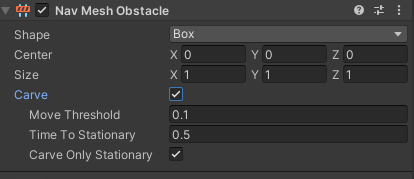
勾选Carve后,当前对象会把已烘焙的Navmesh切割开。
- Move Threshold :当Obstacle对象移动超过了这个阈值,Unity会认为它已经移动,然后更新它切开的Navmesh。要使用它请取消勾选Carve Only Stationary。Navmesh的计算会有一帧延迟
- Time to Stationary:Obstacle对象移动完毕后,把Obstacle对象设为Stationary(静止状态)所需的时间。
- Carve Only Stationary:勾选后,只有当Obstacle对象静止时,才会切割Navmesh。
导航网格障碍物 (Nav Mesh Obstacle) - Unity 手册 (unity3d.com)
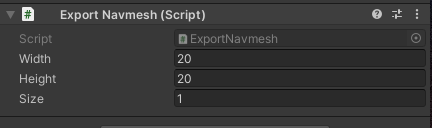
导出寻路网格信息
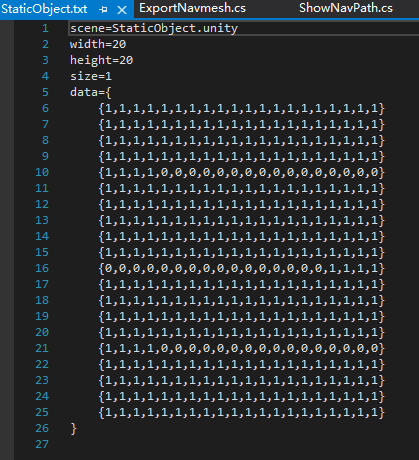
网络游戏中,游戏对象的逻辑是由逻辑服务器计算的。逻辑服务器只储存一些逻辑信息,所以需要把寻路的网格信息导出给服务器使用。
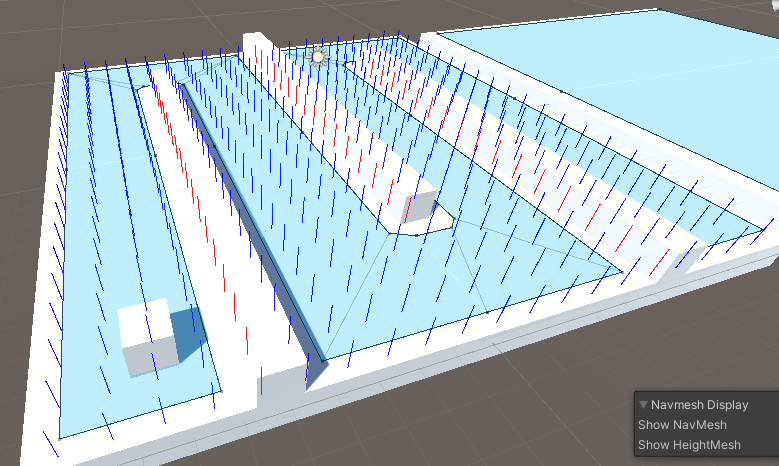
我们可以利用发射线的方式来检测当前地面是否可以行走,然后导出一个二维数组,其中0表示可走,1表示不可走,也就是图中红色和蓝色射线区域
1
2
3
4
5
6
7
8
9
10
11
12
13
14
15
16
17
18
19
20
21
22
23
24
25
26
27
28
29
30
31
32
33
34
35
36
37
38
39
40
41
42
43
44
45
46
47
48
49
50
51
52
53
54
55
56
57
58
59
60
61
62
63
64
65
66
67
68
69
70
71
72
73
74
75
76
77
78
79
80
| #if UNITY_EDITOR
using UnityEngine;
using UnityEngine.AI;
using System.IO;
using UnityEditor;
using System.Text;
public class ExportNavmesh : MonoBehaviour
{
[Tooltip("X坐标格子的数量")]
public int width;
[Tooltip("Y坐标格子的数量")]
public int height;
[Tooltip("每个格子的大小")]
public int size;
private void OnDrawGizmosSelected()
{
if (NavMesh.CalculateTriangulation().indices.Length > 0)
{
string scenePath = UnityEditor.SceneManagement.EditorSceneManager.GetSceneAt(0).path;
string sceneName = System.IO.Path.GetFileName(scenePath);
string filePath = Path.ChangeExtension(Path.Combine(Application.dataPath, sceneName), "txt");
if (File.Exists(filePath))
File.Delete(filePath);
StringBuilder sb = new StringBuilder();
sb.AppendFormat("scene={0}", sceneName).AppendLine();
sb.AppendFormat("width={0}", width).AppendLine();
sb.AppendFormat("height={0}", height).AppendLine();
sb.AppendFormat("size={0}", size).AppendLine();
sb.Append("data={").AppendLine();
Gizmos.color = Color.yellow;
Gizmos.DrawSphere(transform.position, 1);
float widthHalf = (float)width / 2f;
float heightHalf = (float)height / 2f;
float sizeHalf = (float)size / 2f;
for (int i = 0; i < height; i++)
{
sb.Append("\t{");
Vector3 startPos = new Vector3(-widthHalf + sizeHalf, 0, -heightHalf + (i * size) + sizeHalf);
for (int j = 0; j < width; j++)
{
Vector3 source = startPos + Vector3.right * size * j;
NavMeshHit hit;
Color color = Color.red;
int a = 0;
if(NavMesh.SamplePosition(source,out hit, 1f, NavMesh.AllAreas))
{
color = Color.blue;
a = 1;
}
sb.AppendFormat(j > 0 ? ",{0}" : "{0}", a);
Debug.DrawRay(source, Vector3.up, color);
}
sb.Append("}").AppendLine();
}
sb.Append("}").AppendLine();
Gizmos.DrawLine(new Vector3(-widthHalf, 0, -heightHalf), new Vector3(widthHalf, 0, -heightHalf));
Gizmos.DrawLine(new Vector3(widthHalf, 0, -heightHalf), new Vector3(widthHalf, 0, heightHalf));
Gizmos.DrawLine(new Vector3(widthHalf, 0, heightHalf), new Vector3(-widthHalf, 0, heightHalf));
Gizmos.DrawLine(new Vector3(-widthHalf, 0, heightHalf), new Vector3(-widthHalf, 0, -heightHalf));
File.WriteAllText(filePath, sb.ToString());
}
}
}
#endif
|
这个脚本总是在原点开始记录Navmesh,所以挂载在任意对象上都可以
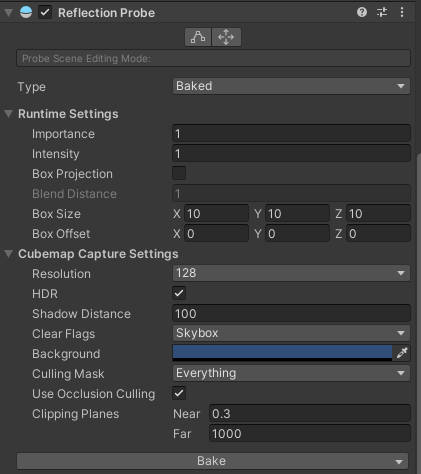
反射探头
游戏使用一个Cubemap来预先生成反射效果,节省实时反射的性能。要生成这个Cubemap,需要反射探头
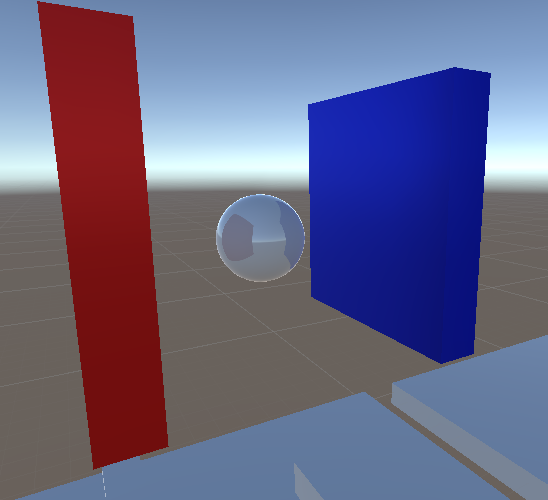
首先需要给具有反射效果的对象添加Reflection Probe组件,然后在scene中就能看到一个矩形区域,在这个区域内的物体都会参与反射,然后给这个对象添加材质,这个材质的Shader是Standard(Specular setup),这种Shader支持镜面反射。
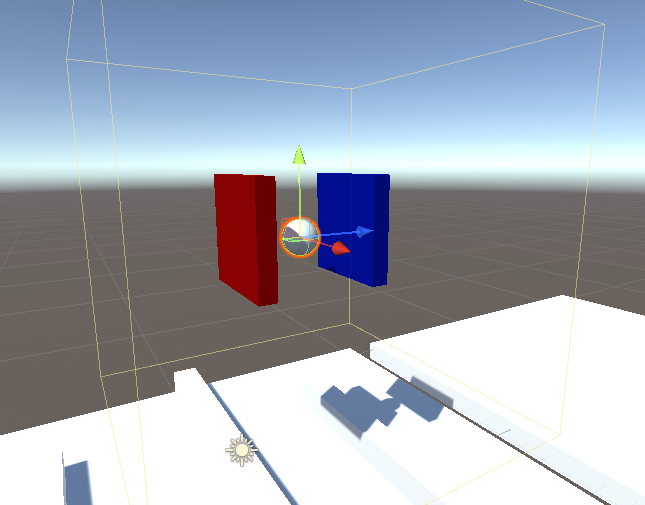
然后给需要被反射的物体添加Reflection Probe Static静态属性,这里是红蓝物体,然后将Reflection Probe组件type改为Bake,点击Bake就可以生成反射用的cubemap了,这里点击的Bake和在lighting面板点击Generate Lighting一样