掉血实现 在Command文件夹中新建HurtPlayerCommand
1
2
3
4
5
6
7
8
9
10
11
12
13
14
15
16
17
using FrameWorkDesign;namespace ShootingEditor2D { public class HurtPlayerCommand : AbstractCommand { private readonly int mHurt; public HurtPlayerCommand (int hurt = 1 { mHurt = hurt; } protected override void OnExecute () { this .GetModel<IPlayerModel>().HP.Value -= mHurt; } } }
在ViewController文件夹中新建AttackPlayer脚本,并将这个脚本挂载在Enemy上,不要忘记将Player的Tag设为“Player”
1
2
3
4
5
6
7
8
9
10
11
12
13
14
15
16
17
18
19
20
21
22
23
24
using UnityEngine;using FrameWorkDesign;namespace ShootingEditor2D { public class AttackPlayer : MonoBehaviour ,IController { public int Hurt = 1 ; public IArchitecture GetArchitecture () { return ShootingEditor2D.Interface; } private void OnCollisionEnter2D (Collision2D collision ) { if (collision.gameObject.CompareTag("Player" )) { this .SendCommand(new HurtPlayerCommand(Hurt)); } } } }
这样掉血功能就完成了
通关界面 首先新建一个场景,命名为GamePass。在场景中新建一个空对象,命名为UI
在ViewController文件夹内新建UI文件夹,并在其中新建UIGamePass脚本,并将这个脚本挂载在UI上。
1
2
3
4
5
6
7
8
9
10
11
12
13
14
15
16
17
18
19
20
21
22
23
24
25
26
27
28
29
30
31
32
33
34
35
36
37
38
39
40
41
42
43
44
45
46
using UnityEngine;using System;namespace ShootingEditor2D { public class UIGamePass : MonoBehaviour { private readonly Lazy<GUIStyle> mLableStyle = new Lazy<GUIStyle>(() => { return new GUIStyle(GUI.skin.label) { fontSize = 80 , alignment = TextAnchor.MiddleCenter }; }); private readonly Lazy<GUIStyle> mButtonStyle = new Lazy<GUIStyle>(() => { return new GUIStyle(GUI.skin.button) { fontSize = 40 , alignment = TextAnchor.MiddleCenter }; }); private void OnGUI () { var labelWidth = 400 ; var labelHeight = 100 ; var labelPosition = new Vector2(Screen.width - labelWidth, Screen.height - labelHeight) * 0.5f ; var labelSize = new Vector2(labelWidth, labelHeight); var labelRect = new Rect(labelPosition, labelSize); GUI.Label(labelRect, "游戏通关" , mLableStyle.Value); var buttonWidth = 200 ; var buttonHeight = 80 ; var buttonPosition = new Vector2(Screen.width - buttonWidth, Screen.height - buttonHeight) * 0.5f + new Vector2(0 ,150 ); var buttonSize = new Vector2(buttonWidth, buttonHeight); var buttonRect = new Rect(buttonPosition, buttonSize); if (GUI.Button(buttonRect, "返回首页" , mButtonStyle.Value)) { } } } }
整理一下文件,将UIController脚本也放在UI文件夹里,在ViewController文件夹内再新建一个Gameplay文件夹,将其余的脚本放在这个文件夹里
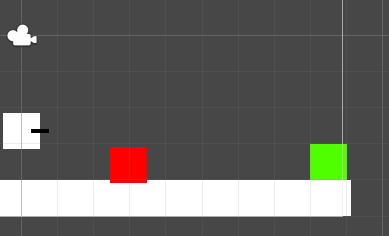
通关逻辑 进入SampleScene,新建一个方块,命名为“NextLevel”,放置在场景边缘,并将颜色设置为绿色,挂载Box Collider2D组件并打开Trigger。
在Gameplay文件夹内新建NextLevel脚本,挂载在NextLevel上,并在Level Name中输入:GamePass
1
2
3
4
5
6
7
8
9
10
11
12
13
14
15
16
17
18
using UnityEngine;using UnityEngine.SceneManagement;namespace ShootingEditor2D { public class NextLevel : MonoBehaviour { public string levelName; private void OnTriggerEnter2D (Collider2D collision ) { if (collision.CompareTag("Player" )) { SceneManager.LoadSceneAsync(levelName); } } } }
打开Build Settings,将GamePass放进里面。
通关逻辑完成。